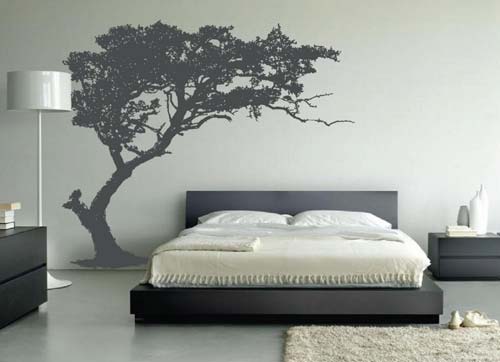
With a 3 and 4 day weekend for quite a few of us coming up, it’s the perfect time to up your home game. Absolutely do the big family barbecues and Easter egg hunts. Load up on chocolate. But take an afternoon to set yourself up for a new home-décor look this season, by upgrading your walls.
Here are our top 5 ways to dramatically change your space by DIYing your walls:
- Start With a Clean Slate: (Remove Your Wallpaper)
There are a few methods, but the most effective route requires a pump sprayer. For really stuck-on wallpaper, gently score through with a box cutter or small knife (be sure not to damage the walls by scoring too deeply). Next, fill the pump sprayer with a 1:1 ratio of boiling hot water to fabric softener. Pump the sprayer a few times to pressurize. Spray the entire area of wallpaper you are removing. After 15 minutes of letting it soak, grab a wide putty knife and start scraping that wallpaper off of the walls. Dig in at bubbly areas and work from there. Reapply the solution as necessary and clean up the area with a large, damp sponge. Voila! Clean slate.
- Fancy Up Your Walls with Reclaimed Wood
Dressing up walls by adding wood planks can change the entire texture of a room. Hunt around on Gumtree, Craigslist, and Free Stuff facebook pages for planks or pallets of all persuasions. After grabbing your materials, sand them down and polish if that’s you’re looking for a cleaner style. Choose the section of wall you’d like to add texture to and grab your stud finder. Locate and mark studs with either chalk or a pencil. Then start stacking your planks by drilling at the stud marks (or use a nail gun). You can use scrap wood to fit between planks to fill out the look. Again, this one is pretty customizable, depending on if you want to cover the entire wall or just highlight a section.
- Make Your Wall a Chalkboard
Chalkboard paint is pretty easily purchased from any hardware store, but it can be darn expensive, especially if you’re buying enough to cover a wall (or an entire room)! Try making your own. The recipe is super simple: 6 parts acrylic paint (in the color of your choice) with 3 parts glazing medium (water-based) mixed with 1 part powder tile grout. And that’s it! My only other suggestion is to make sure the wall is clean before painting. Bumpy chalkboards make it really difficult to draw/write later.
- Put the Writing on the Wall (Paper Wallpaper)
Book pages, sheet music, pamphlets, magazine pages, posters. You name it. There are a thousand pieces of non-wallpaper paper that are screaming to line your walls. But because the usual process (wheat paste) would cause the ink to bleed, you must use vinyl wallpaper adhesive instead. Otherwise the process is pretty similar to any other wallpaper treatment. Apply the adhesive in sections to the wall, carefully laying the paper out over it. Trim edges as you go. Reapply paste after all of the paper is on the walls to seal. Voila!
- Washi Tape (So Many Choices)
Washi Tape is actually the best. The tape is easily removable, so it’s very renter-friendly. There are a million and one tutorials online with different design and color suggestions, but the bottom line is that you really only need a box cutter, washi tape, and a little imagination to completely rejuvenate a room with a washi tape wall treatment.
Happy Decorating!

![5 Reasons You Should Travel Alone Airplane [image source: chau nguyen/ http://thedevilhatessweatpants.blogspot.com.au ], crowd ink, crowdink, crowdink.com, crowdink.com.au](https://crowdink.com/wp-content/uploads/2016/08/Chau-airplane-218x150.jpg)


![5 Reasons You Should Travel Alone Airplane [image source: chau nguyen/ http://thedevilhatessweatpants.blogspot.com.au ], crowd ink, crowdink, crowdink.com, crowdink.com.au](https://crowdink.com/wp-content/uploads/2016/08/Chau-airplane-100x70.jpg)


